Showing posts with label Apps. Show all posts

Friday, September 28, 2018

How to recover lost or deleted files on your Android phone

How to recover lost or deleted files on your Android phone

Should you lost your important files on your Android device? Here’s how you can regain access to them.


If actually you landed on this page from a search engine result, probably one of the following keywords brought you here;

  • Recover lost files on Android phone
  • How to recover lost files in Android
  • Recover lost android files
Well, now that you are here, I'm going to show you the simple ways you can recover your deleted files on your Android phone


Initially, recovering lost files could be executed on PC, but now it has made its extension towards Android smartphones. Losing relevant files on your smartphone is somewhat painful to experience and may be thinking that gaining access back to those files are nearly impossible. You actually need some useful apps/tools to work on your Android phone; this should prevent you from losing your documents or files even if they were unintentionally deleted.

These tools I'm gonna be sharing with you are available on Google Play. You should search any of the tools’ name on Google Play or rather follow the link I’ve provided.
Just a few seconds away from knowing these tools and how to use them; keep reading.


Must Read: How to Secure Your PC From Hackers


#1. MY ES FILE EXPLORER
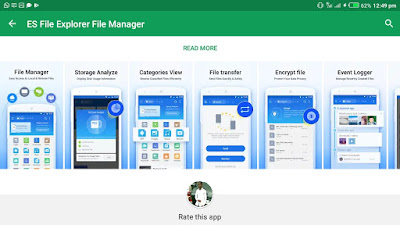


ES File Explorer File Manager available on Google Play Store

This is one of the oldest and trusted file manager or explorer available to every Android devices.
Apart from setting ES File Explorer as your default storage manager (if you wish to) or music player, there's so much task you can handle with it and one of them is what you are about to learn.


If you've ever deleted and recovered a file on Windows PC then you should be familiar with the desktop app known as “Recycle Bin”.
It may interest you to know that ES File Explorer has it also.

Without wasting much time, let's discuss how you can regain access to your lost or deleted Android files with ES File Explorer

Step 1. On your Android device, Download ES File Explorer, preferably from Google Play to avoid malicious attack.

Step 2. After installing the app, launch (open) it and push a slide from your left screen corner and click on “Tools” from the displayed menu

Step 3. Navigate down the menu and there you will find “Recycle Bin” already activated, just click on it and you will find all your deleted files.
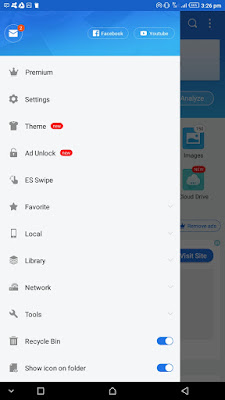

A screenshot of ES File Explorer sliding menu with Recycle bin feature


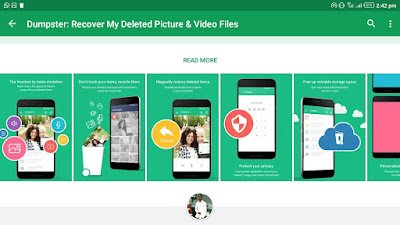
#2. Dumpster


Retrieve your lost or deleted Android files using Dumpster; download from Google Play

This is another amazing tool available on Google Play whose main function is to retrieve deleted files of any format (Mp3, Mp4, txt, jpg, png, doc, and many others), as well as applications.

How To Use Dumpster to Recover Deleted Android Files

Step 2. Open the app and swipe from the left side of your screen to draw out the menu.
Step 3. Go to Settings»»Recycle Bin Settings and select the kind of files you want dumpster to save for you; preferably choose “All” kind of files.
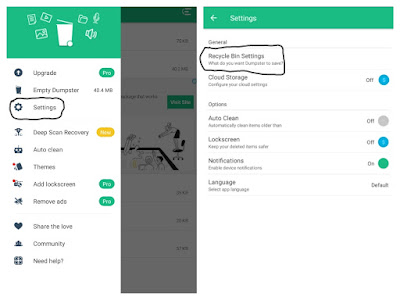


How to setup dumpster recycle bin to help you retrieve deleted contents on Android

Should you ever delete any file from your Android device while Dumpster is installed, you can decide to either permanently delete or retrieve the file. Your decision can only be made in Dumpster app.
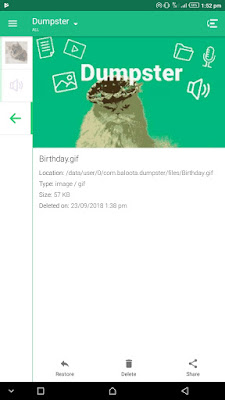

An illustration on how you can restore or permanently delete a file in dumpster recycle bin

Must read: How to effectively recognize Phishing attacks and stay protected

#3. Use Droid Backup
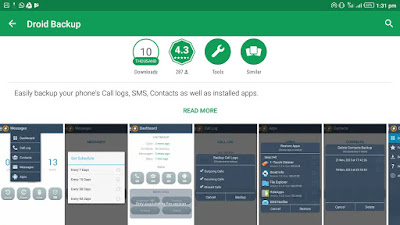


Download and install droid backup from Google play and your relevant files will always be available even when they get lost    


From the name you can easily tell that it’s a backup app which allow you to backup any type of file you do not want to lose. These files include applications, doc files, contacts, SMS, and even call logs.


How To Backup Files Using Droid Backup For Android

Backing up and retrieving files with Droid Backup is very easy. You manually choose what to be backed up and incase you accidentally lose it, Droid backup will always reverse the file into your file storage when you demand for it.

Step 2. Launch the app and click any of the logo belonging to a respective type of file. Assuming you wish to backup an app, for example, you will have to click on the android logo seen at the right end (see screenshot below)


Step 3. Click “backup” and then select the file you want to backup

If your backed up file happen to wipe off from your phone, you can restore it by repeating step 1 and then click “Restore”, then you'll see your backup files, choose the one(s) you want to restore and you're done.


Please share this tips with your friends using the share buttons provides below.


Saturday, August 11, 2018

Best ways to schedule a WhatsApp message for future delivery

Best ways to schedule a WhatsApp message for future delivery

Whatsapp

It is very possible to schedule messages on WhatsApp for later delivery. There are many ways to do this with your phone rooted or not. In this post, I've discussed the best methods of Scheduling a WhatsApp message without requiring to root your phone (all I'm saying is, these methods does not require a rooted device).


Method 1
Scheduler for WhatsApp
This is a third-party app developed to perform exactly as its name.

Step 1. Download and install Scheduler for WhatsApp from Apkpure
Reason: Scheduler for WhatsApp isn't available on Google Play

Step 2. Launch (open) the app and enable Accessibility settings to schedule message (just tap OK when you open the app and turn on WhatsApp scheduler)


Step 4. You are almost there, tap on the “+” icon on red to create a schedule

Step 4. Configure how you want the message to be sent; Select Recipient from your WhatsApp contact, set your time schedule and frequency (how many times you want your scheduled message to be sent)

Step 5. Enter your message into the provided box, you may also attach a photo(s) to your message and hit “create” at the top right of your screen.


That's all. Once the scheduled time is reached, your message will be sent to your selected recipient.

Method 2.
SQEDit- Auto Scheduling App


This is another useful third-party app developed for the purpose of scheduling messages for the later time. This app supports not only WhatsApp but other social / messaging platforms too.
With this app, you can schedule Facebook posts, send automatic emails, schedule text messages / SMS as well as setting call reminders.

How To Use SQEDit
Step 1. Download and install SQEDit on your Android device. It's available on Google Play.

Step 2. Launch the app and create an account or you can sign in with your Facebook account

Step 3. From the listed services, select WhatsApp and click “DONE”. Again, Select WhatsApp to create your message schedule.


Step 4. To be able to schedule your message SQEDit need to access your WhatsApp contact, however, you'll be required to enable accessibility in your settings.
Click “ENABLE ACCESSIBILITY” and turn on accessibility for SQEDit


Step 5. Now you are prepared to schedule your message:
  • Type your message in the provided box and include an attachment (photos, doc, music) using the attachment button (depending on what you are composing)

  • Schedule your future date and time

  • Select the number of repeats if you want your scheduled message to be sent more than once in a specified time interval
Step 6. Having provided your info, proceed by clicking the send icon as seen in the screenshot below


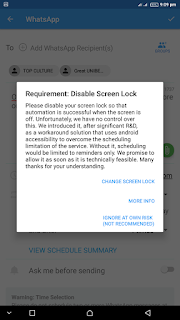
Step 7. Now you will have to disable your screen lock to allow transparency. See reasons as discussed by the developer in the screenshot below


That's all, your messages will be sent as scheduled.


The recommended option for scheduling messages across Facebook, Twitter, Email, SMS and setting reminder
Do It Later


This is my favourite app I use in scheduling messages across my social platforms.
This app will strive to deliver your message as scheduled even if you’re offline and it currently supports Facebook, Twitter and Email only.
To get this started;
Step 1. Download and install “Do it Later”. Get it on Google Play

Step 2. Launch the app and tap the add (+) icon to introduce the social services it supports and choose your target, let's say Facebook.


Step 3. You’ll be directed to where you'll have to sign in your Facebook account. Having signed in, return to the composing page of the app

Step 4. Type your message in the provided box, you may want to include an image(s)


Step 5. Select the number of repeats (by default, repeat is set as “never”)

Step 6. Tap “schedule” at the top right side of your screen to proceed.


Step 7. Your scheduled message goes to the pending list. Click on the pending message and tap send (the telegram icon displaying above your screen). See screenshot below


That's all for using “Do it later” app to schedule messages.

Finally
With the above methods, you should be able to schedule your messages for the future while you may get busy working out other issues of life.
The above three Android apps I discussed have been tested and confirmed working as required. This post was composed according to how I reviewed and make use of the mentioned apps.

Thanks for visiting oshetech.com👊👍


Sunday, April 29, 2018

Instagram adds new data download feature to export pictures and user data

Instagram adds new data download feature to export pictures and user data


Instagram now lets you download all your uploaded pictures on Instagram to your device.

This is one feature users have been wanting from Instagram and it has finally been unleashed, though only available in the web version for now, but it should be accessible to Android and iOS users soon enough.

All thanks to Europe’s upcoming GDPR privacy laws that demand all tech companies to be more true and open about the kind of user data they hide. It also authorizes that they allow users to download a copy of the data anytime they want.

Now you can download all or some of your pictures simply by asking Instagram to release a copy of your data and a link will be sent to the registered email on your account. This link is what can be used to download your photos.

Source: The Verge


Monday, December 18, 2017

How To Convert PDF Files To Word Document Using PDF To Word Converter-Cometdocs.com Inc.

How To Convert PDF Files To Word Document Using PDF To Word Converter-Cometdocs.com Inc.

Cometdocs PDF to Word Converter- Easy way to convert and edit your PDF files.

Oshetech brings you a new useful app for converting any of your PDF files to Word. It's the PDF to Word Converter by Cometdocs.com Inc.

I write this post base on my experience with the app. Some few days ago, Oshetech received an email from Linda Simmons, who introduced this app to us, thankfully the app has it's Android version available on Google Play. I downloaded and installed Cometdocs PDF to Word Converter on my Android device for a review, so good to know there's nothing bad about the app, it's useful. I've been reviewing this app for over a week and I've decided to share my experience with the viewers of Oshetech.


Cometdocs PDF to Word Converter is a very reliable and user-friendly app designed for an effective PDF to Word conversion. The conversion supports Dropbox, One Drive, Google Drive, Box, iCloud, Gmail and others, into editable Microsoft Word documents.

Below are some awesome features of Cometdoc PDF to Word Converter

● Ability to convert scanned and complex PDFs
● An unlimited number of converted files. File size is not a factor
● Industry-leading OCR technology
● You can convert files from Google Drive, OneDrive, Dropbox, Box, Gmail, iCloud, and others
● High-quality PDF to Word conversion

How To Use PDF To Word Converter- Cometdocs.com Inc.

At first, you'll need to download and install ‘PDF To Word Converter- Cometdocs.com Inc.’ from Google Play. Searching for the keyword will bring you lots of similar apps created by the same developer (Cometdocs.com Inc.), just look for the app with the logo as seen in the below screenshot.


Upload The File You Want To Convert
After installation, launch the app and select the file you want to convert. You'll have two options;

● Select file from the device
● Select file from Google Drive, OneDrive, Dropbox, Box, Gmail, iCloud


Note that choosing any of the second options will require sign-in, for example, Google Drive. This option is best for users not having their files saved on the phone but rather in cloud services like Dropbox, Google Drive because they often switch between devices.


See Also: Save your mobile data with the new Datally app by Google

Wait For The Conversion To Complete
Having selected the file, it is imported automatically and once it's done, you can quit the app and wait while the conversion is ongoing.


Note: The conversion is not done on your phone, instead it's executed by their conversion servers where they are automatically converted and at once deleted from the server after a complete process.

Open And Edit Your Converted File
Your new converted file is ready. Once you get the converted file, it is now editable and can be modified using a Word mobile app. Make some changes in the file that was previously uneditable and save it the way you want it.

This is the end of the process. It's pretty easy.

Cometdocs PDF To Word Converter is easy to use, having a great user interface, more mobile and user-friendly.

For Android users, get it on Google Play
For users with devices running on iOS, you can also get PDF To Word Converter by Cometdocs.com Inc. from the Apple Store


Saturday, December 9, 2017

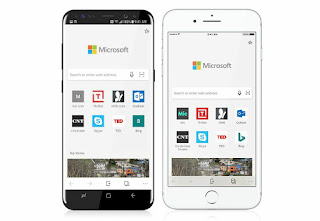
Microsoft finally released Edge browser for Android and iOS devices- Download now!

Microsoft finally released Edge browser for Android and iOS devices- Download now!

Microsoft just completed its mission-- The Edge browser has come to stay on Smartphones of today!!!


Having the Microsoft Edge browser on smartphone devices running on Android and iOS platforms is worth a stress release- with easy access and continuation to all your stuff previously paused the last time they were accessed via Mac/PC version of Edge browser.


Last month, Microsoft announced there will be an Edge browser mobile app version available for Android and iOS devices and further introduced the beta version which many of us have been using.
And today, we now have the Edge browser available on mobile markets- Google Play and iTunes.

The continue on PC we've been hearing to be one of the mobile browser’s features is real. Microsoft has integrated the “continue on PC” feature to work on the Edge mobile browser for Android and Apple iOS. This will enable you to ping a site over to your PC if the site's appearance on mobile view doesn't suit your taste. Good to know that with the new Edge mobile browser, you can resume a lot of your tasks from your phone to a PC, precisely Windows 10.


Read also: Datally by Google could help you control which app consumes your data

There are other amazing features added to the Edge for mobile. These include- ebooks, history, reading list, access to favourites. Unfortunately, Microsoft is yet to include the tab syncing to its mobile version of Edge browser, which means history or tabs can't be shared between PC and Phone.
Though the company is planning to introduce the tab syncing feature later in the future, probably we might have that next year.

However, like I mentioned earlier, the Edge mobile app is now available for everyone around the globe. For Android users, simply download and install Edge browser from Google Play. Apple users should get the app from Apple's store.

Thanks for reading to this very end, why not look for other interesting tech topics on this same blog?